Startup and Controls
Power On
Press central knob once. Brian will boot up to the main menu screen.
Setting
Brian lets you configure your preferred brightness, theme color and sound volume. All of these settings are persistent across reboots. Your program has access to the currently set values and change them during its runtime in the range of 0 to the value selected in the settings (e.g. it can dim the screen, but cannot make it more bright It can play the audio quieter, but not louder than set in the settings).
Power Off
Standard way to power off is from the main menu, by selecting the Power off
item and confirming. Brian also features a force-power-off option,
which can be used when the software is unresponsive.
To trigger the force power off, press all four buttons (not the knob) simultaneously. This feature will only work properly, when not connected to the USB.
Running user programs
Users can write their own programs in any of the supported languages (currently only micro python, others are coming soon). These programs are stored on a micro sd card. The programs are loaded from the card, and the card is required to run a user program.
To start a program, make sure you have a micro SD card inserted, navigate to SD card from the main menu and find your program in the file explorer. Select the main file. This will open a screen with more details and the first option is to run the program.
More information about how to prepare the programs is in the section First program.
Attention
Stopping the program – It is the programmer’s responsibility to provide a mechanism to stop the program (e.g. wait for a specific button press).
If the program is stuck and this mechanism doesn’t work, you can always eject the SD card. This will stop the program, but at the risk of a filesystem corruption. You can also force-power-off the entire Brian.
Sensor demo
Brian features a way how to quickly experiment with the supported
sensor without writing your own program. The demo tries to detect
what kind of sensor is connected to a given port and displays the value it
returns. If the sensor supports multiple modes, the modes will be available to
select by a Modes menu under the right button.
Navigate from the main menu to Demo programs and
then Sensor view. Select a sensor port (Brian’s bottom side)
which you want to monitor. Grab one of the supported sensors and connect
it to the specified port. You will see its corresponding data screen, and modes,
if available. You can always unplug this sensor and use a different one.

Supported sensors
Currently, Brian supports these sensors:
Brian Touch sensor
Brian Color sensor
Brian UltraSonic sensor
Brian Gyro sensor
EV3 Touch sensor
EV3 Color sensor
EV3 UltraSonic sensor
EV3 Gyro sensor
NXT Touch sensor
NXT UltraSonic sensor
NXT Sound sensor
HiTechnic Gyro sensor
[  ] Support for more sensors is planned in the future. If you need to use a
specific sensor, please let us know on our feedback page
GitHub issues
issues and we will prioritize it.
] Support for more sensors is planned in the future. If you need to use a
specific sensor, please let us know on our feedback page
GitHub issues
issues and we will prioritize it.
Motor demo
Brian can control up to four motors connected to the motor ports (Brian’s top side). The prepared demo shows control of the motor in two different modes:
Angle - rotates to the given angle and holds it there. Reacts to an external force trying to rotate the motor, by trying to keep it at the given rotation.
Speed - sets the speed of the motor, which will turn indefinitely. If an external force is braking the motor, it increases the power to keep the rotation speed stable.
Navigate from the main menu to Demo programs and then Motor demo.
You will be presented with one of the two control mode.
You can toggle between them any time using the right button.
Connect one to four motors to the motor ports. They will be detected and start
turning according to the desired input.
Next to the port icons on the left and right side a number of strength icons (icon-power) may appear, at the scale 0 to 3 icons.

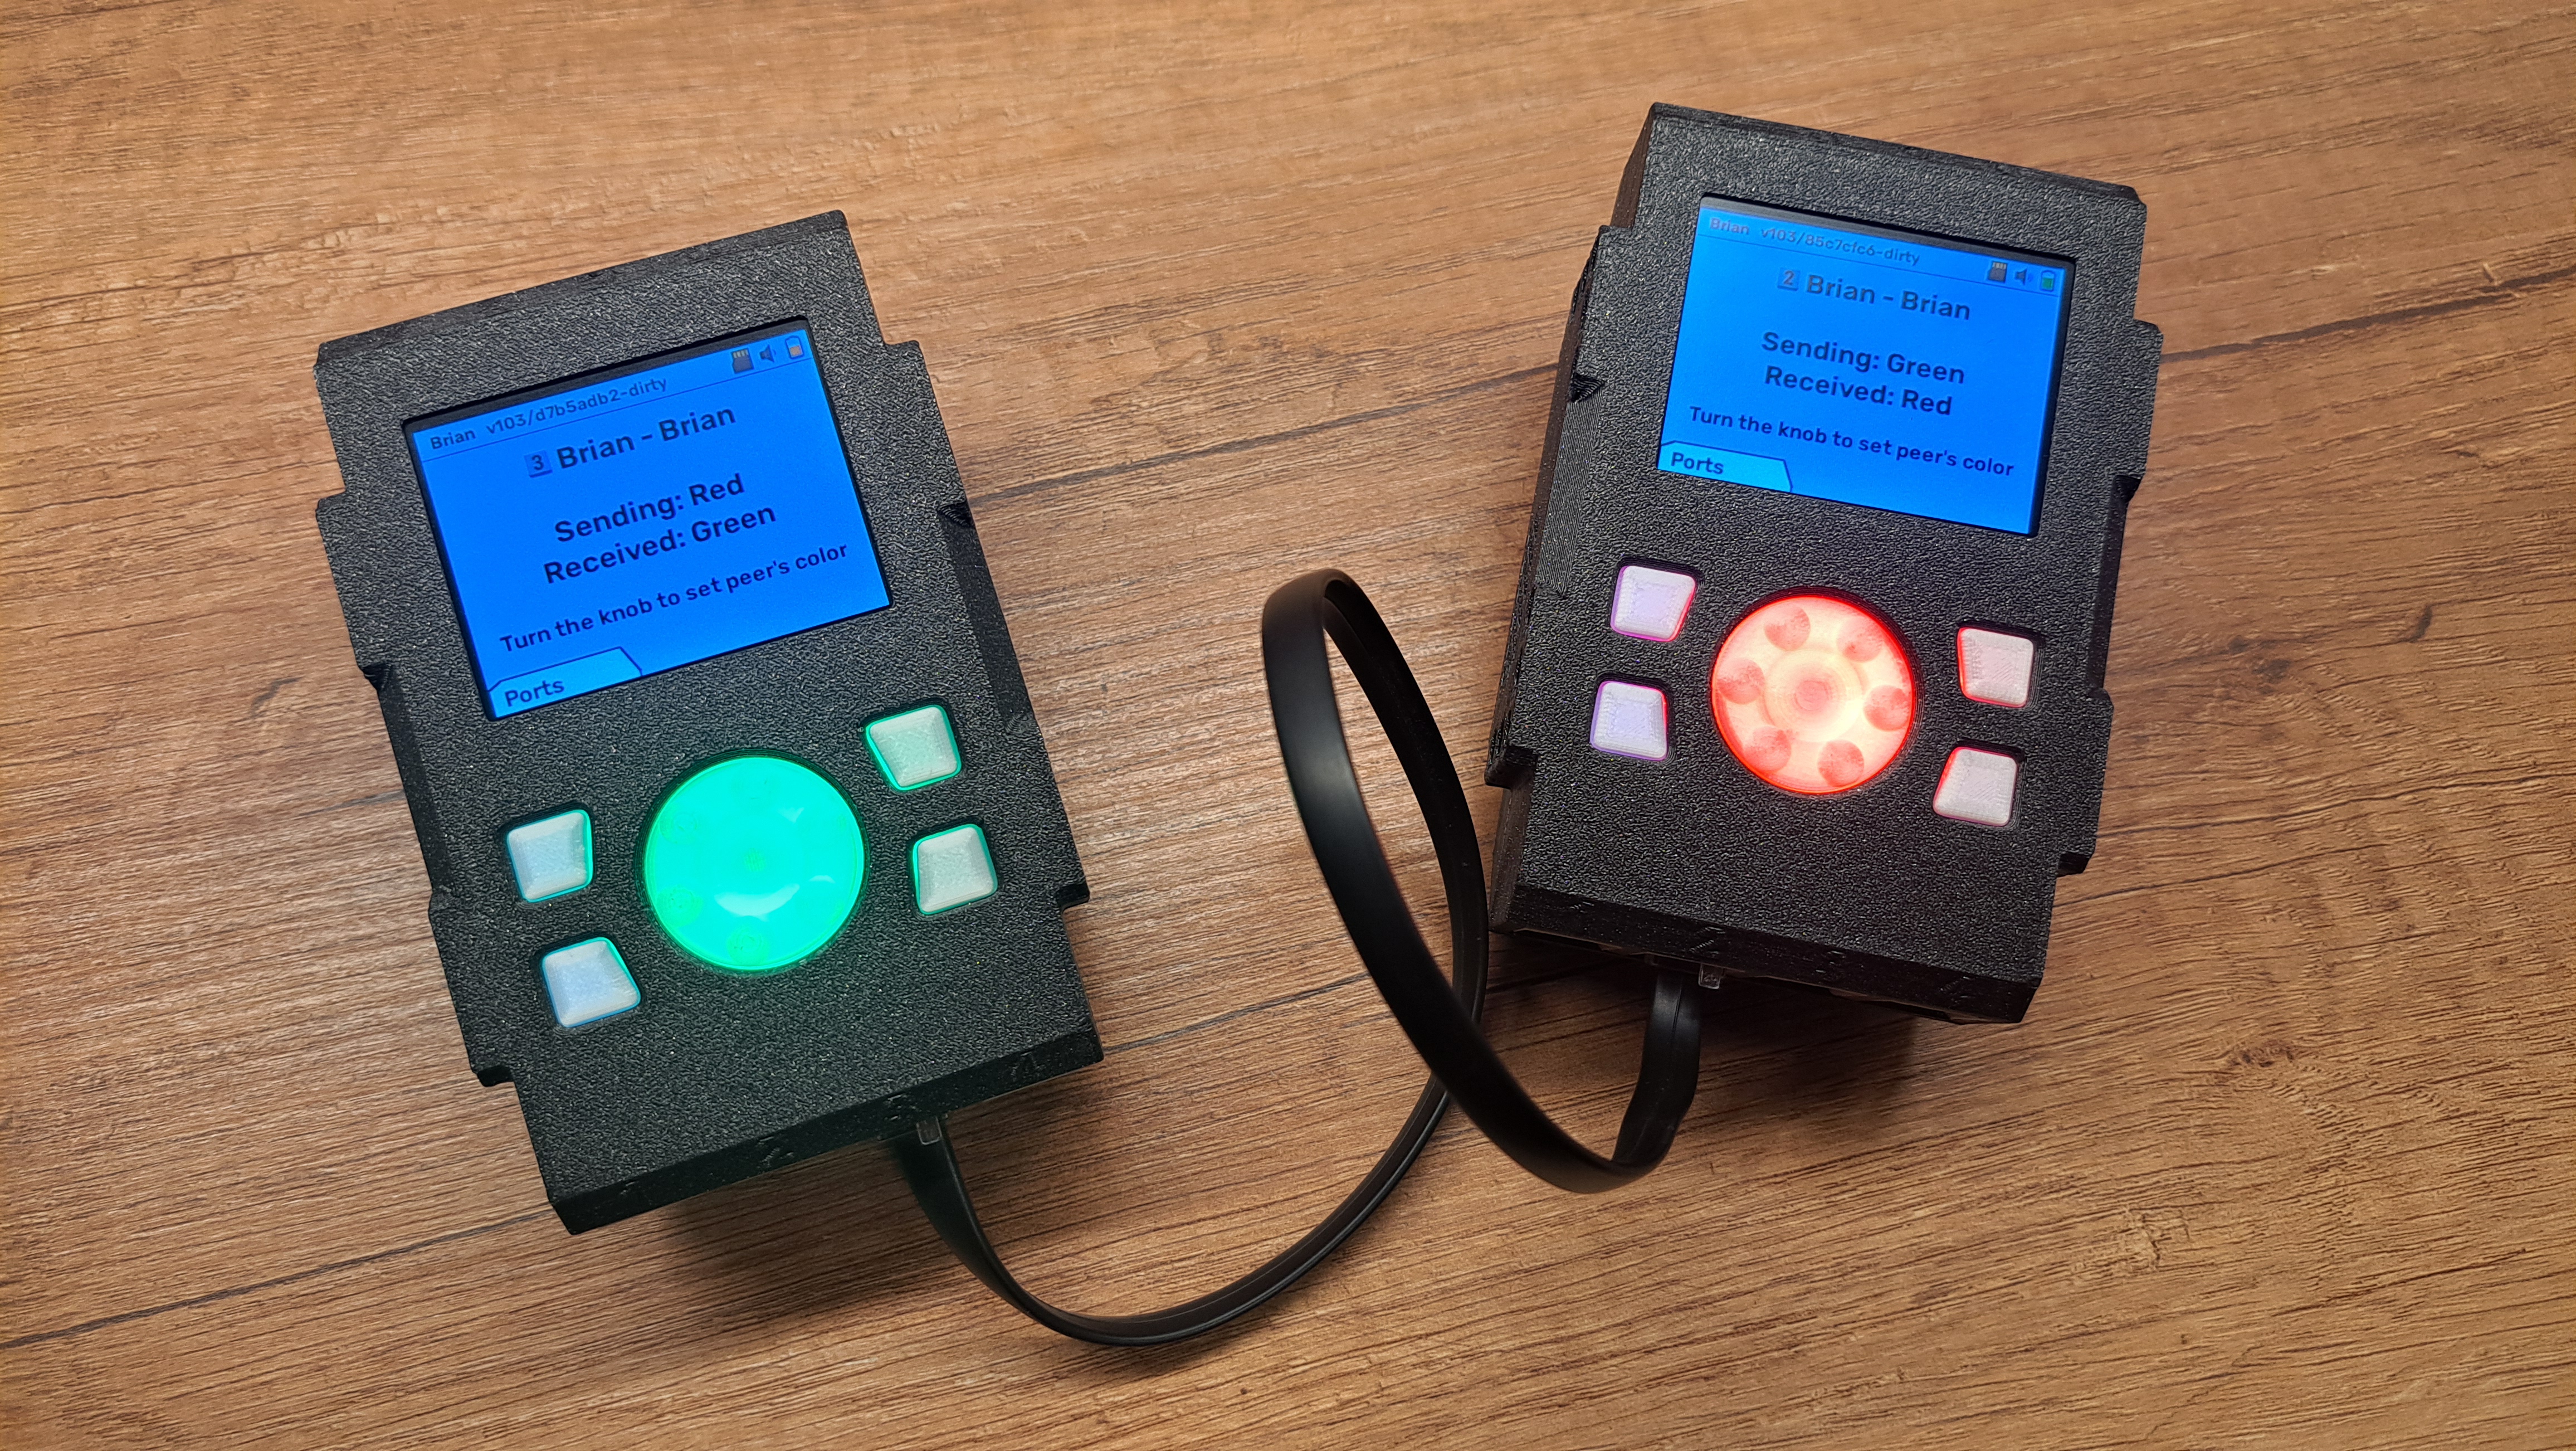
Brian to Brian communication demo
Any two Brian’s can be connected together using a cable from the sensor port of one,
to the sensor port of the other. In this link, one has to be considered a master,
and the other slave. However, this does not pose any limit on the communication itself,
which is full duplex. The prepared demo in Demo programs and Brian - Brian sets
the knob color of one Brian by rotating the knob on the other. The demo also supports
a self-loop to demonstrate the communication with only one device.
[ ] The user programs have access to the raw communication line and can use it
however they want to. We plan implementing various features needed for more advance
networking directly into the firmware for the users convenience. Some those of the features are:
Connecting more than two Brians and using the central nodes as automatic hops (similar to network switch), which will forward the messages to the intended recipients.
Standard control of another Brian’s sensor and motor ports, without the need of running a special custom program on the peer.
Using motor ports for the connections. This will let you use more sensors at the expense of max motor count. We provide the flexibility, you chose what fits your application the best.